Begin at the Beginning: Chapter One
This book is broken up into lots of short chapters. I've tried to make every chapter take about five minutes to complete, although a handful might take 10 minutes because they cover more complicated topics. These short chapters are designed to make it easier for you to start and stop as you need to, to re-read chapters if there was something you didn't fully understand, and allow you to see your progress more clearly as you move from chapter to chapter.
Important: when you see code with a filename attached, like the below, it means you should write that code in that file. Like this:
dist/somefile.js
Put this code into somefile.js
in the dist directory.
Code without a title is either a command to run on the command line, or is code presented just for your reference – in which case I often prefix it with "The following code won't work because…". There are some places where you'll see code with a filename in the context of reading code in that file rather than writing, but these places are clearly marked. For example, I might say "here's how your code should look if you've been following along…"
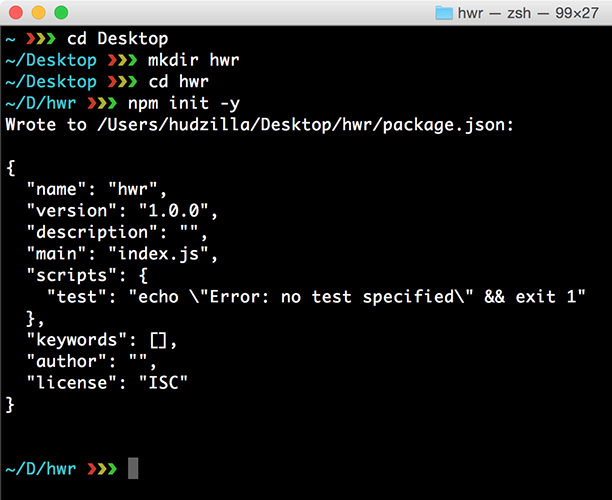
Anyway, that's more than enough explanation. If you're ready, let's get started: open the Terminal app and run these commands to create your project directory:
cd Desktop
mkdir hwr
cd hwr
npm init -y
If you've never used the Terminal command before, you should be able to find it using Spotlight on OS X. If you're using Windows, you should use the Command Prompt. If you're using Linux, any terminal emulator is fine.
The first command switches to your desktop, which makes finding your work easier. The second command creates a new directory called hwr - short for Hacking with React - but you can call it whatever you want within reason. Note: calling it "react" will cause problems, so please try to be original!
The third command navigates into the newly created hwr directory, which is where we'll be working for the remainder of this tutorial. This is your project directory, and you should run all future commands from here. The final command creates a new project using npm, at which point you're ready to go.
Before we do any coding, we have a bit of boring configuration to get through. This is unavoidable, I'm afraid, but at the same time it's hugely valuable: you'll be spending the next few hours working through this tutorial, so spending five minutes making sure your project is configured correctly will make your life much easier!
In your terminal window, still in your project directory, run these commands:
npm install --save-dev webpack webpack-dev-server react-hot-loader
npm install --save-dev babel-core babel-loader
npm install --save-dev babel-preset-es2015 babel-preset-react
npm install --save react react-dom history react-router
Note: if you see "command not found" for npm, it means you don't have Node.js installed. You need to go to nodejs.org and install Node.js then try again.
Those npm commands take a little while to run because they pull in quite a few pieces of software. If you've never used npm before, the first three commands mean "install this software for use while I'm developing," and the fourth means "install this software for use while I'm developing, but I'll also need it when my app is in production too."
If you were wondering, Babel is a tool that accepts ES6 and React code as input, and creates regular JavaScript as output. This is important because the technologies we'll be using aren't compatible with web browsers, so it's Babel's job to make it compatible in a process known as "transpiling" - converting ES6 source code to old-school JavaScript.
With all that software installed, the next step is to tell them how they should work together. In your project directory, look for a file named package.json and open it in a text editor. Please add these lines just after where it says "license": "ISC":
package.json
"babel": {
    "presets": [
        "es2015",
        "react"
    ]
},
Note that you need a comma at the end of the closing brace – that's the } symbol. In case you're not sure where to put it, here's a complete package.json file for reference:
package.json
{
    "name": "hwr",
    "version": "1.0.0",
    "description": "",
    "main": "index.js",
    "scripts": {
        "test": "echo \"Error: no test specified\" && exit 1"
    },
    "keywords": [],
    "author": "",
    "license": "ISC",
    "babel": {
        "presets": [
            "es2015",
            "react"
        ]
    },
    "devDependencies": {
        "babel-core": "^6.7.2",
        "babel-loader": "^6.2.4",
        "babel-preset-es2015": "^6.6.0",
        "babel-preset-react": "^6.5.0",
        "react-hot-loader": "^1.3.0",
        "webpack": "^1.12.14",
        "webpack-dev-server": "^1.14.1"
    },
    "dependencies": {
        "history": "^2.0.1",
        "react": "^0.14.7",
        "react-dom": "^0.14.7",
        "react-router": "^2.0.1"
    }
}
The last step in our configuration is to prepare Webpack, which is a tool that converts all our source code into one finished app ready to ship to users. Webpack is controlled by a file named webpack.config.js, which doesn't exist yet. So, please paste the below into a file and save it as webpack.config.js in your project directory:
webpack.config.js
var webpack = require('webpack');

module.exports = {
    entry: [
        'webpack-dev-server/client?http://localhost:8080',
        'webpack/hot/only-dev-server',
        './src/index.js'
    ],
    module: {
        loaders: [{
            test: /\.js?$/,
            exclude: /node_modules/,
            loader: 'react-hot!babel'
        }]
    },
    resolve: {
        extensions: ['', '.js']
    },
    output: {
        path: 'dist',
        publicPath: '/',
        filename: 'bundle.js'
    },
    devServer: {
        contentBase: './dist',
        hot: true
    },
    plugins: [
        new webpack.HotModuleReplacementPlugin()
    ]
};
That configures Webpack to read all our source code and convert it into a single finished script called bundle.js inside a directory called dist – short for "distribution". We haven't made that directory yet, so please create it inside your project directory now. While you're there, please also create one called src – that's short for "source" and it's where we'll be storing all the source code we write.
So, we have src for our source code, and dist for files ready to distribute to the world. The next step is to add the bare minimum to those directories in order for our project to start working. To do that, create a new file in src called index.js, giving it this content:
src/index.js
console.log('React is up and running!');When the script runs, that will show a simple message so you can be sure everything is working correctly.
In the dist directory, please create index.html with this content:
dist/index.html
<!DOCTYPE html>
<html>
    <body>
        <div id="app"></div>
        <script src="bundle.js"></script>
    </body>
</html>
There are two interesting things in there. First, <div id="app"></div> is where we'll be asking React to render our app in just a few moments. Second, <script src="bundle.js"></script> is the finished script that Webpack builds for us by combining all our code into one single file.
With those two files created, you should be able to run webpack from your terminal window and see output like this:
Hash: 696d94eec4dc3cb40865
Version: webpack 1.12.9
Time: 1304ms
    Asset    Size  Chunks             Chunk Names
bundle.js  940 kB       0  [emitted]  main
   [0] multi main 52 bytes {0} [built]
    + 245 hidden modules
If you see errors like "command not found" after you run the webpack command, try this command:
npm install -g webpack webpack-dev-serverThat command installs two key components globally to your system. This can occasionally result in permissions problems with messages like Error: EACCES: permission denied, but this handy guide will help you fix that.
Once that completes, hopefully you should be able to run webpack and see green results.
Buy the book for $10
Get the complete, unabridged Hacking with React e-book and take your learning to the next level - includes a 45-day no questions asked money back guarantee!
If this was helpful, please take a moment to tell others about Hacking with React by tweeting about it!
Copyright ©2016 Paul Hudson. Follow me: @twostraws.